


")
In this tutorial, you will learn how to install Odoo 17 on Ubuntu 22.04. If you are reading this article, then I am sure you are coming here for the Odoo installation guide. But, for those who are trying Odoo for the first time, a quick overview of Odoo.
Odoo is a bundle of open-source business apps that cover all your company needs, such as CRM, eCommerce, accounting, inventory, point of sale, project management, etc. Odoo is highly customisable and it is very popular in the business community. Currently, Odoo has around 12 million customer base.
Install Odoo 17 on Ubuntu 22.04
Before installation, your server needs to meet minimum server specifications for setup. Also, you should have basic ideas on the Command Line. That’s all.
Minimum Server Requirements for Odoo 17 Installation on Ubuntu 22.04
Before starting with installation, just make sure your server meets the following requirements.
- A running Ubuntu machine with Ubuntu 22.04 or Ubuntu 20.04
- A user account with sudo privileges
I am assuming, you fulfilled the requirements for the Odoo 17 installation on Ubuntu 22.04 or Ubuntu 20.04. Let’s start step by step.
Step 1: Update Ubuntu packages on the Server
It is always recommended to update and upgrade your existing Ubuntu packages before any application installation.
Open a terminal session and run the following commands to update and upgrade your system first.
sudo apt update
sudo apt upgrade
Step 2: Install Odoo 17 Dependencies
As Odoo is written in Python, you need to install all the Python dependencies. Run the following commands to install all dependencies.
sudo apt-get install -y python3-pip python3-dev python3-venv libxml2-dev libxslt1-dev zlib1g-dev libsasl2-dev libldap2-dev build-essential libssl-dev libffi-dev libmysqlclient-dev libjpeg-dev libpq-dev libjpeg8-dev liblcms2-dev libblas-dev libatlas-base-dev -y

Step 3. Install NPM and CSS plugins
Once the dependencies are installed, we will install package management for the JavaScript programming language:
sudo apt-get install -y npm
sudo ln -s /usr/bin/nodejs /usr/bin/node
sudo npm install -g less less-plugin-clean-css
sudo apt-get install -y node-less
Step 4: Install Wkhtmltopdf for report generation
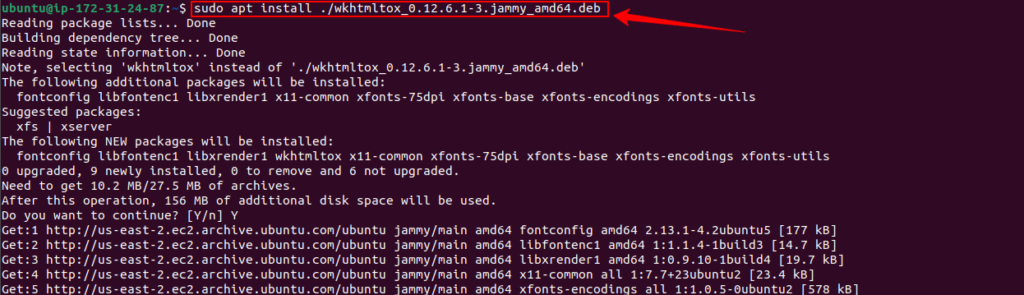
Install Wkhtmltopdf, an open-source command line tool to render HTML into PDF reports. It is required to generate reports in Odoo. Run the following commands to install Wkhtmltopdf.
sudo wget https://github.com/wkhtmltopdf/packaging/releases/download/0.12.6-1/wkhtmltox_0.12.6-1.bionic_amd64.deb
sudo dpkg -i wkhtmltox_0.12.6-1.bionic_amd64.deb
sudo apt install -f
Step 4: PostgreSQL Installation and Configuration
Odoo runs with the PostgreSQL database. Installing PostgreSQL on Ubuntu is pretty simple. Just run the following command to install PostgreSQL on your server.
sudo apt install postgresql -yOnce installed, start and enable the PostgreSQL service by below command.
sudo systemctl start postgresql && sudo systemctl enable postgresqlTo check the status execute the following command.
sudo systemctl status postgresqlNow, create a PostgreSQL user by matching the Ubuntu user name, we created in step 3
sudo su - postgres -c "createuser -s odoo17"The command switches to the Postgres user and executes the createuser command with the -s flag to create a new PostgreSQL user named odoo17 with superuser privileges. It will manage the database operations.
Step 5: Create Odoo user
Although you can run all the commands as the root user, always use a specific user, it will protect your server from being compromised. Create a user with a separate home directory for Odoo installation. Use the following command to create a new user, (The user name should be identical, in our case we name it odoo17)
sudo useradd -m -U -r -d /opt/odoo17 -s /bin/bash odoo17(You have to use sudo if you are running on Ubuntu or any other user)
Set the user password for odoo17
sudo passwd odoo17It will ask for a new password, enter your secure password.
New password: YourStrongPasswordHere
Retype new password: YourStrongPasswordHere
Password: The password was updated successfully.
Explanation:
- sudo: This command is used to execute subsequent commands with superuser (or root) privileges.
- useradd: This is a command used in Unix-like operating systems to create a new user account.
- -m: This flag instructs useradd to create a home directory for the new user. If the directory already exists, it is not overwritten.
- -d /opt/odoo17: This option specifies the home directory for the new user as /opt/odoo17. The home directory is where the user will be placed upon login.
- -U: This flag tells useradd to create a group with the same name as the user and make the user a member of that group.
- -r: This option creates a system account. System accounts are typically used for services and daemons rather than regular users. They have a lower UID (user ID) range and typically have no login capabilities.
- -s /bin/bash: This sets the default shell for the new user to /bin/bash. The shell is the command-line interface that users interact with when they log in.
- odoo17: This is the username being created. Adjusting this part of the command will result in creating a user with a different name.
Step 6: Install Odoo from the Source
For Odod installation, first switch to the user you created earlier (step 5).
sudo - odoo17Now, clone the Odoo 17 source code from it’s official repository.
git clone https://www.github.com/odoo/odoo --depth 1 --branch 17.0 /opt/odoo17/odoo17

Now, change the directory to the Odoo source directory.
cd /opt/odoo17Now create a Python virtual environment to install Python packages, which will be required by Odoo.
python3 -m venv odoo17-venv
source odoo17-venv/bin/activate
pip install --upgrade pip
pip3 install wheel
pip3 install -r odoo17/requirements.txt
Once done with Python environment tasks, deactivate and create odoo addon directories and Odoo log file.
deactivate
mkdir /opt/odoo17/odoo17-custom-addons
chown -R odoo17:odoo17 /opt/odoo17/odoo17-custom-addons
sudo mkdir -p /var/log/odoo17
sudo touch /var/log/odoo17.log
sudo chown -R odoo17:odoo17 /var/log/odoo17
Step 7: Odoo configuration file setting
Now, create an Odoo configuration file. This step is most important to work Odoo to your requirements. Create a configuration file in the “etc” directory by running following command.
sudo touch /etc/odoo17.conf
sudo vi /etc/odoo17.conf
Now, add the following lines to the file.
[options]
; Database operations password:
admin_passwd = PASSWORD
db_host = False
db_port = False
db_user = odoo
db_password = False
addons_path = /opt/odoo17/odoo/addons,/opt/odoo17/odoo/custom_addons
logfile = /var/log/odoo17.log
log_level  = debug
Don’t forget to replace admin_passwd with a secure password. Now save the files by pressing “ESC” and “:wq”, if you are using vi editor.
Now, update the ownership and permission of the configuration file, you just created.
sudo chown odoo17:odoo17 /etc/odoo17.confThis command changes the owner and group of the file /etc/odoo17.conf to odoo17:odoo17, ensuring that the user odoo17 and the group odoo17 have appropriate permissions to access and modify the configuration file.
Step 8: Create an Odoo systemd unit file
We will create systemd file to manage odoo service easily. Run the following command to create systemd file.
sudo touch /etc/systemd/system/odoo17.serviceNow, open the systemd file by following the command
sudo vi /etc/systemd/system/odoo17.serviceAdd following lines
[Unit]
Description=odoo17
After=network.target postgresql@14-main.service

[Service]
Type=simple
SyslogIdentifier=odoo17
PermissionsStartOnly=true
User=odoo17
Group=odoo17
ExecStart=/opt/odoo17/odoo17-venv/bin/python3 /opt/odoo17/odoo17/odoo-bin -c /etc/odoo17.conf
StandardOutput=journal+console

[Install]
WantedBy=multi-user.target
Now, reload the daemon, start and enable the Odoo service
sudo systemctl daemon-reload
sudo systemctl start odoo17 && sudo systemctl enable odoo17
Now, check the status of the service and execute the following command
sudo systemctl status odoo17Now Odoo17 services are up and running. To access the Odoo, you need to enable port 8069 ( By default Odoo uses port 8069, also change the port if you want).
http://”YOUR SERVER IP”:8069


Hurray, you have successfully installed Odoo17 on Ubuntu 22.04. Now follow Odoo starting configurations on the browser to complete the setup.
Conclusion
In this tutorial, you have learned, how to install Odoo17 on Ubuntu 22.04. If you find any difficulties during installation, you can comment here. I will try to help you.


")

")