


Codeigniter is a robust PHP framework for creating full-featured apps quickly. This is a mostly used PHP Framework that is Open Source and developers create it for developers. The most recent version available for application development is Codeigniter 4.
This guide will walk you through the process where you will learn how to install CodeIgniter on Ubuntu 20.04.
Prerequisites
On your PC, you’ll need a web server, a MySQL database server, and PHP to run the Codeigniter 4 framework. Install the LAMP stack on your Ubuntu 20.04 machine using the instructions below.
Step 1 – Installing Composer
This article will show you how to use PHP composer to develop a Codeigniter 4 application. PHP Composer is accessible as a binary file that may be downloaded and used directly. To install composer on your Ubuntu machine, do the steps below.
curl -sS https://getcomposer.org/installer | php
mv composer.phar /usr/local/bin/composer
chmod +x /usr/local/bin/composer
Step 2 – Create CodeIgniter Application
To construct new apps, Codeigniter includes an application beginning composer module. The skeleton application is included in the Codeigniter application starter repository, as is the composer dependent on the most recently published version of the framework.
To install CodeIgniter on Ubuntu 20.04 on your machine, use the following command:
composer create-project codeigniter4/appstarter CodeAppThis will show an output like this:
Creating a "codeigniter4/appstarter" project at "./CodeApp"
Installing codeigniter4/appstarter (v4.0.3)
  - Installing codeigniter4/appstarter (v4.0.3): Downloading (100%)
Created project in /home/rahul/CodeApp
Loading composer repositories with package information
Updating dependencies (including require-dev)
Package operations: 35 installs, 0 updates, 0 removals
  - Installing laminas/laminas-zendframework-bridge (1.0.4): Downloading (100%)
  - Installing laminas/laminas-escaper (2.6.1): Downloading (100%)

  [hiding long output]

sebastian/global-state suggests installing ext-uopz (*)
phpunit/php-code-coverage suggests installing ext-xdebug (^2.7.2)
phpunit/phpunit suggests installing phpunit/php-invoker (^2.0.0)
phpunit/phpunit suggests installing ext-soap (*)
phpunit/phpunit suggests installing ext-xdebug (*)
Writing lock file
Generating autoload files
3 packages you are using are looking for funding.
Use the `composer fund` command to find out more!
Generating autoload files
Generated autoload files
Now Codeigniter apps are stored in the CodeApp directory.
Step 3 – Configure Database
Now, in MySQL, build a database for your Codeigniter application. My computer is running MySQL 5.7. Connected to MySQL as root, then used the following queries to create a database and a user.
mysql -u root -pRun the following queries to establish a database and a user for your application.
CREATE DATABASE codeigniter4;
CREATE USER 'dbuser'@'localhost' IDENTIFIED BY '_password_';
GRANT ALL ON codeigniter4.* to 'dbuser'@'localhost';
FLUSH PRIVILEGES;
quit
Then, in a text editor, edit the database configuration file and adjust the database settings you created before. To modify a file in the application directory, use the following command:
nano app/Config/Database.phpMake changes to the following values.
public $default = [
	'DSN'      => '',
	'hostname' => 'localhost',
	'username' => 'dbuser',
	'password' => 'm2n1shlko',
	'database' => 'codeigniter4',
	'DBDriver' => 'MySQLi',
	'DBPrefix' => '',
	'pConnect' => false,
	'DBDebug'  => (ENVIRONMENT !== 'production'),
	'cacheOn'  => false,
	'cacheDir' => '',
	'charset'  => 'utf8',
	'DBCollat' => 'utf8_general_ci',
	'swapPre'  => '',
	'encrypt'  => false,
	'compress' => false,
	'strictOn' => false,
	'failover' => [],
	'port'     => 3306,
];
Step 4 – Configure Codeigniter Application
You must now specify your application’s base URL. I’m going to use the www.tecadmin.local domain as an example for this application in this tutorial. You may also use localhost or another domain name that you choose.
To modify the App.php file inside a text editor, use the following command:
vi app/Config/App.phpUpdate the baseURL in App.php to that same domain name of your application:
public $baseURL = 'http://www.technoracle.local/';Now you might also need to modify your application’s timezone by using the appTimezone variable.
public $appTimezone = 'UTC';Save file and close.
Step 5 – Configure Apache for Codeigniter
On my Ubuntu machine, I’m using the Apache web server for this lesson. So, for our Codeigniter application, create an entirely new Virtual Host configuration file.
Let’s make a new file and modify it:
vi /etc/apache2/sites-available/codeigniter4.confAdd the following text with the appropriate server name and alias:
<VirtualHost *:80>
    ServerName tecadmin.local
    ServerAlias www.tecadmin.local
    DocumentRoot /var/www/CodeApp/public
    <Directory /var/www/CodeApp>
          Allowoverride All
    </Directory>
</VirtualHost>
Your Apache Virtual Host file system should be saved.
Then, run a2enmod to activate the newly built Codeigniter Virtual Host. Reboot the Apache service as well to implement the modifications.
sudo a2ensite codeigniter4
sudo systemctl restart apache2
Step 6 – Test Application
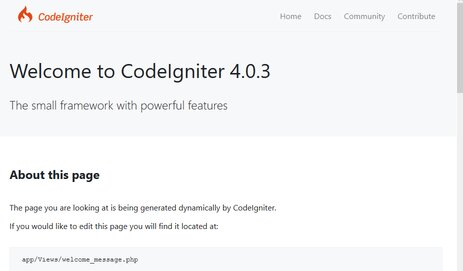
On your Ubuntu machine, the CodeIgnator 4 program is ready to use. You may use the specified domain name to access the program via a web browser.
http://www.technoracle.local/By default, you will see the screen below.
Conclusion
You learned how to install CodeIgniter on Ubuntu 20.04 and construct a Codeigniter application and deploy it using the Apache web server in this article. Let’s get started with Codeigniter.
")
")
