

How to install LAMP on Ubuntu 22.04. In this article, you will learn step-by-step LAMP installation on Ubuntu 22.04. This guide will also cover how to install and secure your domain with Let’sencrypt. So let’s get started.
How to Install LAMP on Ubuntu 22.04
Prerequisites
- Ubuntu Server 22.04 Jammy Jellyfish
- Root access to the Server
Step 1: Apache setup with basic firewall update
Apache is open-source software, that powers almost 50% of websites around the world. Install Apache by running following command.
$ sudo apt update
$ sudo apt install apache2
Once the apache installation is completed, you can check the status of the installation by the following command.
$ sudo service apache2 statusIf apache is installed properly, it will show as “active”
● apache2.service - The Apache HTTP Server
     Loaded: loaded (/lib/systemd/system/apache2.service; enabled; vendor preset: enabled)
     Active: active (running) since Fri 2022-04-29 10:18:34 IST; 4min 17s ago
       Docs: https://httpd.apache.org/docs/2.4/
   Main PID: 9641 (apache2)
      Tasks: 55 (limit: 9303)
     Memory: 5.2M
        CPU: 52ms
     CGroup: /system.slice/apache2.service
             ├─9641 /usr/sbin/apache2 -k start
             ├─9642 /usr/sbin/apache2 -k start
             └─9644 /usr/sbin/apache2 -k start
Tweak firewall setting to allow web traffic
Now allow HTTP and HTTPS traffic through the firewall. Use the following command
$ sudo ufw app listOutput:
Available applications:
  Apache
  Apache Full
  Apache Secure
  CUPS
Now allow 80 and 443. To check use the following command.
$ sudo ufw app info "Apache Full"Output
Profile: Apache Full
Title: Web Server (HTTP, HTTPS)
Description: Apache v2 is the next generation of the omnipresent Apache web server.

Ports:
80,443/tcp
Now check, apache is running or not using the browser.

Step 2: MySql Installation
As the Apache webserver is running, now we need a database to host websites. Now we will install MySQL using the following command.
$ sudo apt install mysql-serverAfter installation is completed, run the following command to secure MySQL installation.
$ sudo mysql_secure_installationStep 3: Install PHP
PHP is a broadly useful programming language that is particularly fit to web development. PHP can be run on Apache and can adjust information in the database too. Run the following command to install PHP on Ubuntu 22.04
$ sudo apt install php libapache2-mod-php php-mysqlAfter PHP installation is complete, verify by the following command.
$ php -vNow, change the Apache configuration to serve index.php instead of index.html. By default apache servers index.html
$ sudo vi /etc/apache2/mods-enabled/dir.confIt will look like
<IfModule mod_dir.c>
        DirectoryIndex index.html index.cgi index.pl index.php index.xhtml index.htm
</IfModule>

# vim: syntax=apache ts=4 sw=4 sts=4 sr noet
Now, create a PHP file to make sure your server is working fine. Move the file to the Apache document root.
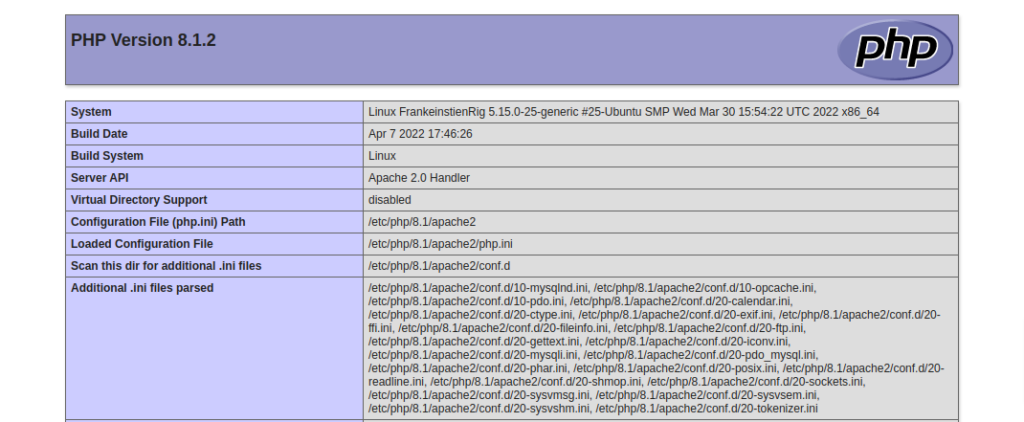
$ sudo vi /var/www/html/info.phpCode snippet
<? php
phpinfo();
?>
Now, you can check your website on the browser
Conclusion
Congratulations, you have successfully installed LAMP on Ubuntu 22.04. For multiple domain hosts on a single server, follow this tutorial.
")
")
