


If you want to host multiple websites on a single EC2 instance, then this article is for you. In this guide, I will explain how to host multiple sites in a single ec2 instance step by step with detailed infographics. So let’s dive in.
Step by Step Guide to Host Multiple Sites
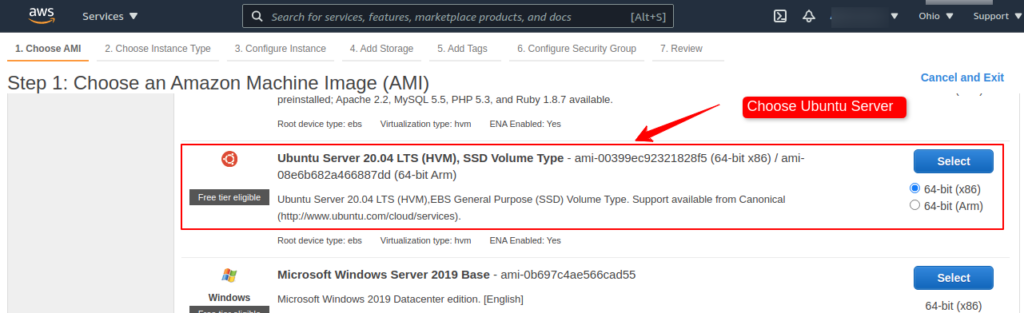
To host multiple websites on EC2 instance, I am taking Ubuntu instance to show you the detailed steps.
Step 1: EC2 Instance Creation
First, create or launch an EC2 instance from the EC2 dashboard under services.
Now choose instance type followed by click Reviews and Launch.
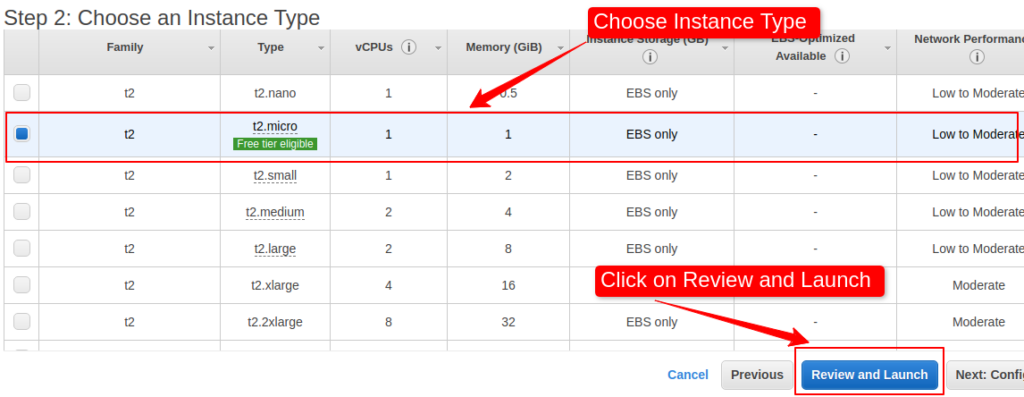
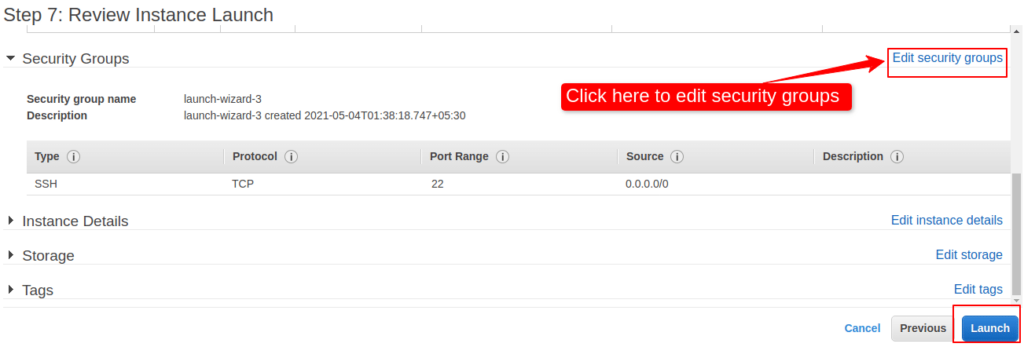
After clicking review and launch, you need to modify security groups.
I am skipping some steps here, as our main purpose is to host multiple websites in a single instance. If you not sure, how to launch the EC2 instance, you can check the details article here.
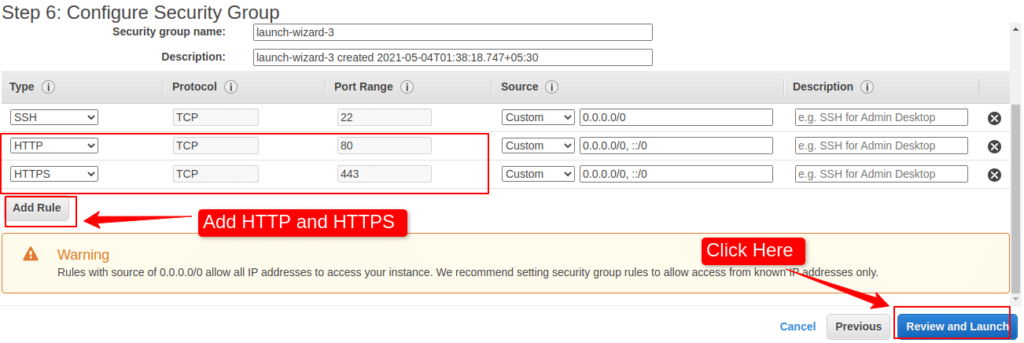
Now, we have to add HTTP port 80 and HTTPS port 343 to make the instance accessible from the browser. Click on the Add Rule to add both http and https port.
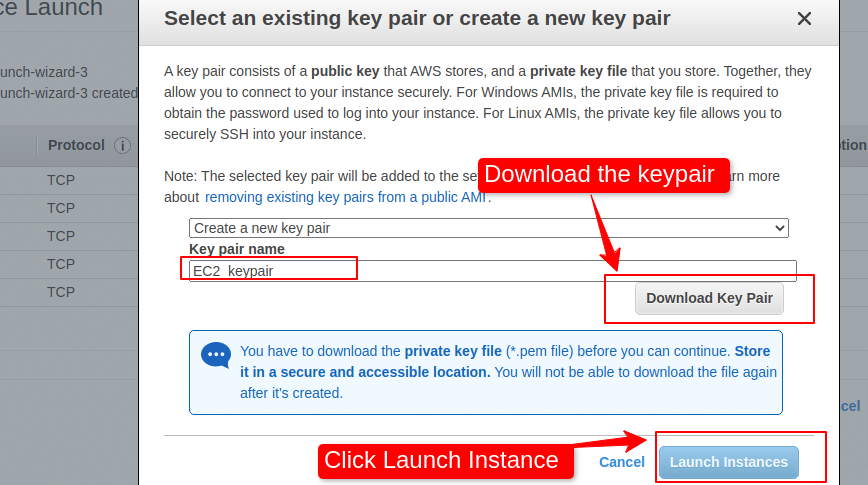
After clicking Review and Launch a new window will open, where instance preview will be shown. Click on Launch to complete the process of instance setup. A final window will open, where it will ask to choose a keypair. Create a new keypair or choose an existing one.
Now your instance is up and running.
Step 2: LAMP setup to host websites on the EC2 instance
In this step, you have to install LAMP stack to run your websites. After installing LAMP, you can check the IP in the browser.
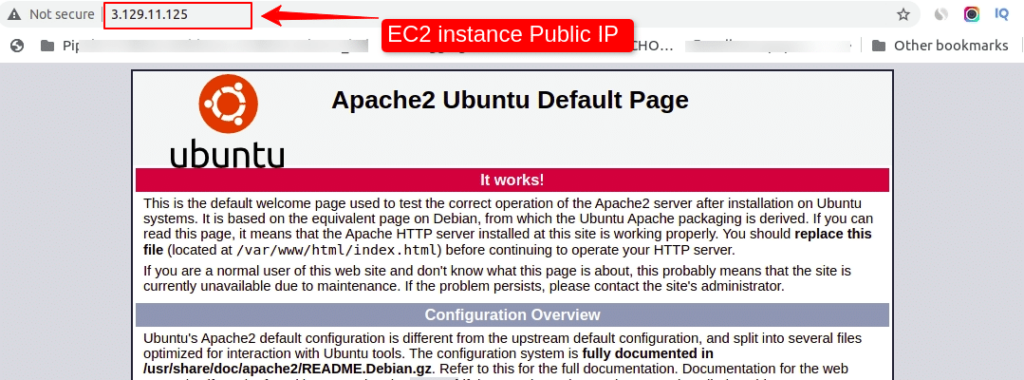
Your EC2 instance is now configured with Apache server.
Step 3: Now modify virtual host file to host multiple websites
Now access the server using SSH to modify the Apache virtual host file. Let’s do this step by step. We need to create separate directories for all the websites
Step 3.1: Create Directories for the websites
Create all the directories for the websites by using the domain name. I am creating example1.com and example2.com inside the apache document root by running the following commands.
Apache document root is
$ /var/www/html$ mkdir /var/www/example1.com/html
$ mkdir /var/www/example2.com/htmlStep 3.2: Permission Update on the document root
Now we have to change to permission from the root user to apache user (www-data)
$ sudo chown -R $USER:$USER /var/www/website1.com/html
$ sudo chown -R $USER:$USER /var/www/website2.com/html
We should also modify our permissions to ensure that read access to web directory and all of the files and folders.
$ sudo chmod -R 755 /var/wwwStep 3.3: Create Sample file to test the websites
Create “index.html” file under both the directories.
For “website1.com”.
$ sudo vi /var/www/website1.com/html/index.htmlAdd the following html code to the file.
<html>
  <head>
    <title>Welcome to website1.com</title>
  </head>
  <body>
    <h1>Website 1 is up and running!!</h1>
  </body>
</html>
Save the file by pressing escape, then colon(:) and then press “wq“.
W -> Write, Q -> Quite.
Now, instead of creating another new “index.html” file for website2.com, you can just copy to directory.
$ sudo cp /var/www/website1.com/html/index.html /var/www/website2.com/html/index.htmlNow, modify the “index.html” of website2.com and add following lines.
<html>
  <head>
    <title>Welcome to website2.com</title>
  </head>
  <body>
    <h1>Website 2 is up and running!!</h1>
  </body>
</html>
Step 3.4: Create first virtual file of “website1”
First, copy the file to keep the default one safe.
$ sudo cp /etc/apache2/sites-available/000-default.conf /etc/apache2/sites-available/website1.com.confNow open “website1.com.conf” and edit the file as below
<VirtualHost *:80>
    ServerAdmin [email protected]
    ServerName website1.com
    ServerAlias www.website1.com
    DocumentRoot /var/www/website1.com/html
    ErrorLog ${APACHE_LOG_DIR}/error.log
    CustomLog ${APACHE_LOG_DIR}/access.log combined
</VirtualHost>
Save and close the file.
Step 3.5: Copy first virtual file of “website1” to “website2”
As we have first virtual hosts file. We can create another one for website2 by copying the website1 conf file.
$ sudo cp /etc/apache2/sites-available/website1.com.conf /etc/apache2/sites-available/website2.com.confNow open the file in editor to modify the values.
$ sudo vi /etc/apache2/sites-available/website2.com.confAdd the following line to the file.
<VirtualHost *:80>
    ServerAdmin [email protected]
    ServerName website2.com
    ServerAlias www.website2.com
    DocumentRoot /var/www/website2.com/html
    ErrorLog ${APACHE_LOG_DIR}/error.log
    CustomLog ${APACHE_LOG_DIR}/access.log combined
</VirtualHost>
Step 3.6: Enable New Virtual Hosts files
To enable both virtual host files, we need to run a2ensite command.
$ sudo a2ensite website1.com.conf
$ sudo a2ensite website2.com.conf

Disable default virtual host file using following command.

$ sudo a2dissite 000-default.conf
When you are finished, you need to restart Apache to make these changes take effect and check the status.
$ sudo systemctl restart apache2
$ sudo systemctl status apache2
Your instance is ready to server both website.
Step 3.7: Test Websites Using Local Host Modify(Optional)
Now, you can test both website by mapping the domain name locally using local host file modification.
Open hosts file from the location “/etc/hosts”
127.0.0.1   localhost
127.0.1.1   guest-desktop
your_server_IP website1.com
your_server_IP website2.com
Replace your_server_IP with the actual instance public IP and save the file.
Step 3.8: Test Your Results on Browser
Now you can check your website on browser (Local system).

Check second website on the browser
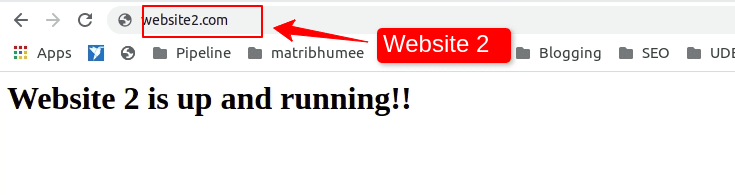
Both of your websites are running on a single AWS EC2 instance.
Read More: Install WordPress in 10min on AWS
Read More: Updated VI Keyboard Shortcuts – Make Your Command-Line Super Friendly [PDF Cheatsheet]
Read More: How To Setup FTP on AWS EC2 Ubuntu Instance
Conclusion
In this article, you have learned how to host multiple websites on a single AWS EC2 instance. Following the article step by step, you can set up your websites within a couple of minutes. If you like this article, please share it on your social media handle. If you have any questions, comment below, and I will answer all of them.
")
")
