


To run a dynamic website, web application, and its functionalities, every webserver needs the “LAMP” stack installed on the server. A LAMP is an acronym that represents the Linux-based Operating system, with the Apache web server, the data are stored into the MySql database, and the website code processed by PHP. The LAMP stack is a set of open-source software. In this article, I am going to explain step by step method of install LAMP on Ubuntu 20.04.
How to install LAMP on Ubuntu 20.04
Prerequisites
- Ubuntu Server 20.04 Bionic Beaver
- Installation requires root privileges either directly as a root user or by the use of sudo command.
- If the server is AWS EC2 based ubuntu server, then SSH access to the EC2 instance.
In my case, I am going to use the AWS EC2 Ubuntu instance to demonstrate the whole installation step by step. Before installing the LAMP stack or any new ubuntu packages, always download the latest package information from Ubuntu using the following command.
sudo apt updateStep 1: Apache installation with basic firewall update
Apache is an open-source and free web server software that powers around 40% of websites around the world.
To install Apache run following commands on terminal
sudo apt update
sudo apt install apache2
Now type y and hit ENTER to complete the installation. Once installation completed, you can check the installation by typing the following command.
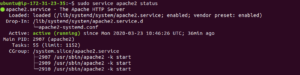
sudo service apache2 statusIt will show as “active (running)”
Change firewall settings to allow web traffic.
Now make sure that your UFW firewall allows HTTP and HTTPS traffic. Use the following command.
sudo ufw app listOutput:
Available applications:
Apache
Apache Full
Apache Secure
OpenSSH
Now, we need to make sure that “Apache Full” allows traffic on 80 and 443. To check, use the following command.
sudo ufw app info "Apache Full"Output
Profile: Apache Full
Title: Web Server (HTTP, HTTPS)
Description: Apache v2 is the next generation of the omnipresent Apache web server.
Ports:
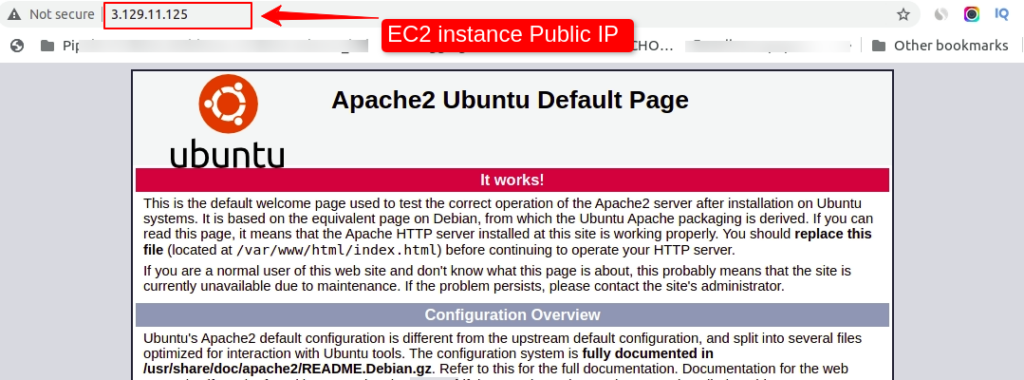
80,443/tcpTo ensure Apache is running, enter the IP address of your server in the address bar of the browser and press ENTER
You will see the default Ubuntu 20.04 Apache web page. It should look something like this
Now let’s move on to the second step.
Step 2: MySql Installation with Database creation.
Now the webserver is up and running, it’s time to install MySQL. MySQL is an open-source relational database management system and it is one of the components of the LAMP stack.
We can install MySQL using the below steps
The first step is to install MySQL which can be accomplished by running the below command.
sudo apt install mysql-serverNow type y and hit ENTER to complete the installation
After complete installation is done, run below command (optional) but recommended.
sudo mysql_secure_installationOutput:
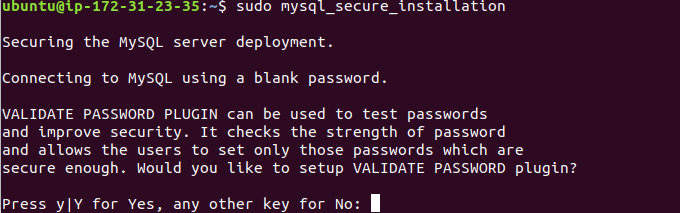
Follow the interactive command session to continue with MySQL secure installation.
Step 3: Install PHP
PHP is a popular general-purpose scripting language that is especially suited to web development. PHP can be run on Apache and can alter data in the database also. By typing below command we can install PHP.
sudo apt install php libapache2-mod-php php-mysqlOnce installation completed, you can check the version of the PHP
php -vThe output should be similar to the below screenshot.

Now, modify the way Apache serves files when directories are requested. By default, Apache will first look for a file called index.html. We will change it to index.php by modifying the file dir.conf using any editor such as Vim or Gedit.
sudo vi /etc/apache2/mods-enabled/dir.confIt will look like

Move the index.php file before the index.html and save the file. After this, restart the Apache webserver in order for your changes to be recognized. Do this by typing this:
In order to test that your system is configured properly for PHP, create a very basic PHP script called info.php. In order for Apache to find this file and serve it correctly, it must be saved to your webroot directory./var/www/html/info.php
sudo service apache2 restartStep 4: PHP processing testing on the server
In order to test that your system is configured properly for PHP, create a very basic PHP script called info.php. In order for Apache to find this file and serve it correctly, it must be saved to your webroot directory.
sudo vi /var/www/html/info.php<? php
phpinfo();
?>Now you can test whether your web server is able to correctly display content generated by this PHP script. To try this out, visit this page in your web browser. You’ll need your server’s public IP address again.
The address you will want to visit is:
http://your_domain/info.php or IP Address/info.phpThe page that you come to should look something like this:
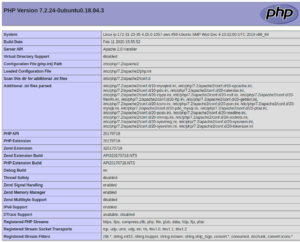
If the above page is displaying in the browser, it indicates that your PHP installation is successful. Now, remove the above PHP script from the server.
Conclusion
Now you have install LAMP on Ubuntu server successfully that you have a LAMP stack installed on your server, Now you can run most of the CMS(Content Management System) such as WordPress, Drupal, Zoomla, and many more.
")
")

2 Comments
On step 1 you say you’re doing a “basic firewall update”, but you are only checking what ports apache uses.
Step 2 is called “MySql Installation with Database creation” but you aren’t creating a database.
On step 3 there is no need to change anything in /etc/apache2/mods-enabled/dir.conf.
On step 4 there’s a syntax error, it should be “<?php", not "<? php".
Thanks, will correct it on update.