


Moodle is a learning platform designed to provide educators, administrators, and learners with a single robust, secure and integrated system. It provides personalized learning environments to the user. In this article, I will share step by step guide to install Moodle on Ubuntu 20.04 EC2 instance.
Moodle Installation on AWS EC2 Ubuntu instance
Prerequisites
- Ubuntu 20.04
- Primary Memory(RAM) 1 GB and minimum 200MB disk space.
- LAMP stack installed.
Installation steps of Moodle on AWS EC2
Before installing Moodle on Ubuntu AWS EC2 instance, make sure LAMP is already setup. Also map the domain mapped with domain manager.
Step 1: SSH into the EC2 Instance to Install Moodle Dependencies
First, connect EC2 instance using SSH and update the software packages by following command.
sudo apt updateBefore installing dependencies please check your server PHP version. To check the PHP version run the following command.
php -vAs my PHP version is 7.4, I need to install PHP 7.4 extensions. Now, install the Moodle dependencies by the following commands.
$ sudo apt install graphviz aspell ghostscript clamav php7.4-pspell php7.4-curl php7.4-gd php7.4-intl php7.4-mysql php7.4-xml php7.4-xmlrpc php7.4-ldap php7.4-zip php7.4-soap php7.4-mbstringNow, restart apache by the following command.$ sudo apt updateNow, restart apache by the following command.
sudo systemctl restart apache2Step 2: Download Moodle and Install
You can download Moodle from the official site or you can also clone the updated Moodle version from the git repository.
Download Moodle from Official Website
To download the moodle, browse the official site and navigate to the download section. Right-click on the download button to copy the download URL.
sudo wget https://download.moodle.org/download.php/stable311/moodle-latest-311.tgz Now, extract tgz file using the following command.
sudo tar -zxvf moodle-latest-311.tgzAfter extracting the tarball, move the Moodle directory to the webserver document root.
sudo tar -xvzf moodle-latest-311.tgz -C /var/www/htmlCreate a new directory inside the document root.
mkdir /var/www/html/moodledataNow, adjust file permission as below
sudo chown -R www-data:www-data /var/www/html/moodle/sudo chmod -R 755 /var/www/html/moodle/sudo chown www-data /var/www/html/moodledataClone the Moodle GitHub repository
If you want to clone the Github repository, open the terminal and run the below command to install Git on Ubuntu 20.04
sudo apt install gitNow clone Moodle from the Git repository by the following command.
sudo git clone git://git.moodle.org/moodle.gitcd moodleNow retrieve a list of each branch available by the following command.
sudo git branch -aNow, tell git to track the branch which you are going to use.
sudo git branch --track MOODLE_39_STABLE origin/MOODLE_39_STABLENow check out with Moodle version.
sudo git checkout MOODLE_39_STABLENow, copy all the files to the document root
$ sudo cp -R /home/ubuntu/moodle /var/www/html/
$ sudo mkdir /var/www/moodledata
$ sudo chown -R www-data:www-data /var/www/moodledata
$ sudo chmod -R 777 /var/www/moodledata
After installation, change the permissions to 0755.
$ sudo chmod -R 755 /var/www/html/moodleStep 3: Create Database for Moodle Installation
To create a database. First, log in to the MySQL console using the following command.
$ mysql -u root -pType password for MySQL login and hit Enter on the keyboard. After login in to the MySQL console, run the following command to create a database.
mysql> CREATE DATABASE moodle;Now, it’s up to you, whether you want to create a separate user for Moodle or not. If you create Moodle database user, run the following command.
mysql> CREATE USER 'moodle'@'localhost' IDENTIFIED BY 'new_password_here';Grant permission to the Moodle user to access, modify, delete the database, etc.
mysql> GRANT ALL ON moodle.* TO 'moodle@localhost' IDENTIFIED BY 'user_password_here' WITH GRANT OPTION;
mysql> FLUSH PRIVILEGES;
mysql> EXIT;
Step 4: Create a Apache Virtual Host
We will create a virtual host called moodle.conf. To create a virtual host, run the following command.
$ sudo vi /etc/apache2/sites-available/moodle.confAdd the following line to the file and saved it.
<VirtualHost *:80>
ServerAdmin [email protected]
DocumentRoot /var/www/html/moodle/
ServerName example.com
ServerAlias www.example.com

<Directory /var/www/html/moodle/>
Options +FollowSymlinks
AllowOverride All
Require all granted
</Directory>

ErrorLog ${APACHE_LOG_DIR}/error.log
CustomLog ${APACHE_LOG_DIR}/access.log combined

</VirtualHost>
Next, enable the apache virtual host.
$ sudo a2enmod rewrite
$ sudo a2ensite moodle.conf
Finally, restart the apache to make the changes work.
Step 5: install Moodle on Ubuntu via Browser.
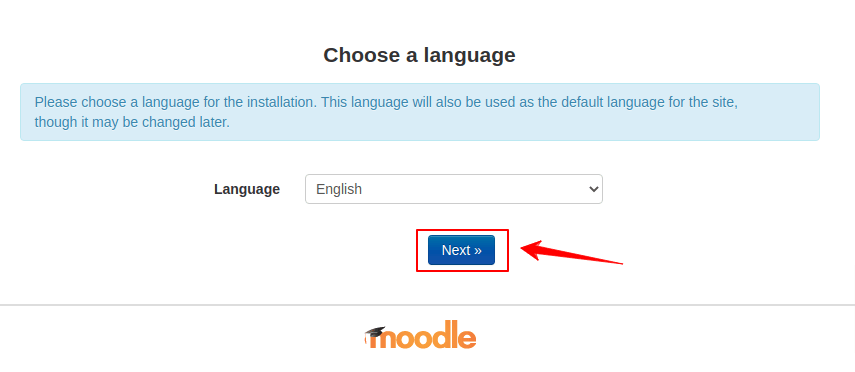
Now, launch your browser, and continue with the installation.
server_IP/moodleAn installation screen will appear. Click on Next
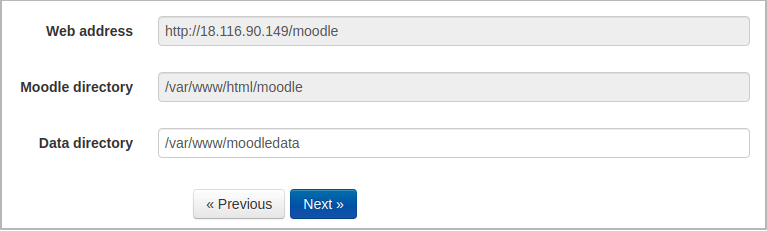
Now, confirm the installation path, and click Next again.
Choose database driver.

Possible Error During Installation
Parent directory (/var/www) is not writeable. Data directory (/var/www/moodledata) cannot be created by the installer.
To fix the above error, you have to give ownership to the document root by the following command.
$ sudo chown -R www-data:www-data /var/wwwConclusion
In this tutorial, you have learned to install Moodle on Ubuntu. If you have any doubt, feel free to comment below. Also, you can join our elite Facebook group to get direct help from me. If you like this article, please share this article on your social media handle.
")
")
