


To get better performance, we upgrade our web server. In this tutorial, I am going to share how to Install or Migrate WordPress to AWS Lightsail Instance.
So let’s get started.
Migrate WordPress to AWS Lightsail Instance Bitnami LAMPP
I am migrating my website from Digital Ocean to AWS Lightsail Bitnami instance for better performance. I will share step by step guide to do it yourself.
Step 1: Create an Instance on LightSail
First login to AWS console, then go to services and click on AWS Lightsail.
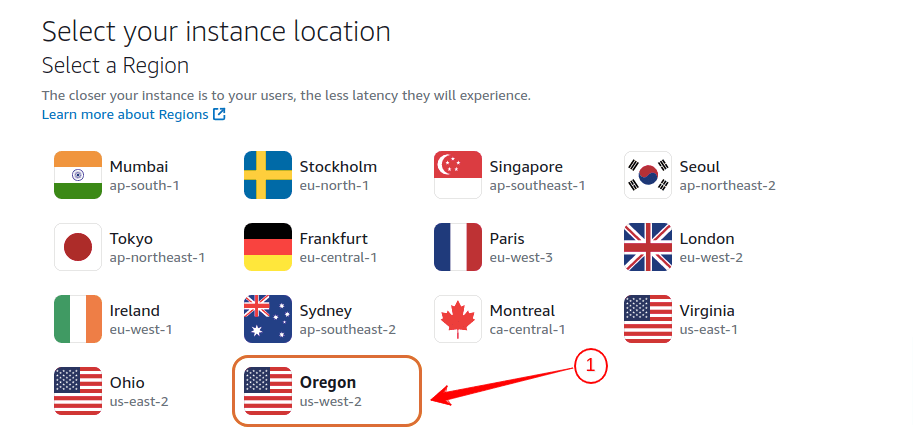
On AWS Lightsail dashboard, first select instance location. I am choosing the Oregon location, as my targeted audience is the United States.
You can choose location according to your blog or website targeted audience.
Select Instance Location
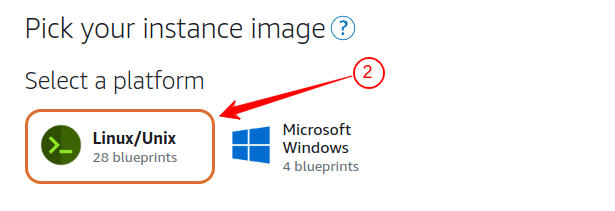
After selecting instance location choose instance image platform, whether it is linux or windows. In my case I am choosing Linux.
Select Instance Platform
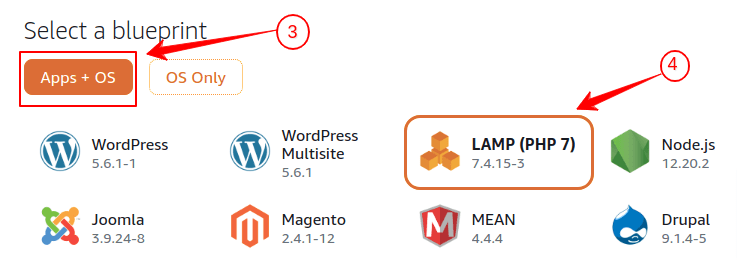
Select OS(Operating System) for Instance
Now, you need to select os or Apps + OS If you select Apps + OS, you can choose pre-installed applications such as WordPress, Magento, Joomla, Node.js, etc.
when you select only OS, you will be able to choose any operating system from the list, such as Ubuntu, Amazon Linux, Debian, CentOS, etc with different versions.
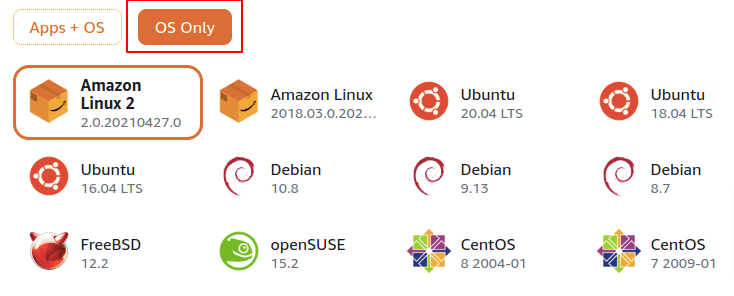
If you choose any raw OS(operating system), you have to set up a LAMP stack to host your website.
SSH key pair generate for server access
Now, you need to select the SSH key pair for accessing the Lightsail instance via command line. You may select the default key pair, however it is recommended to create a new ssh key pair.
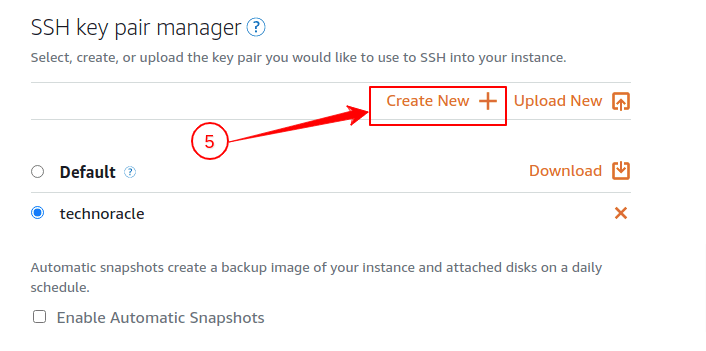
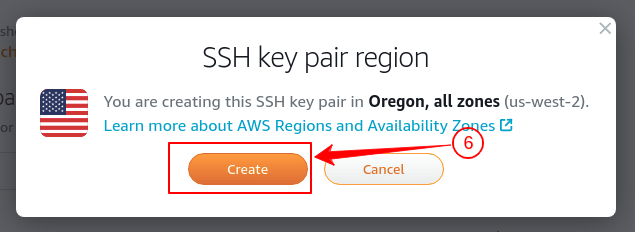
When you click on Create New, an alert box will show the SSH key pair region with the create button to continue.
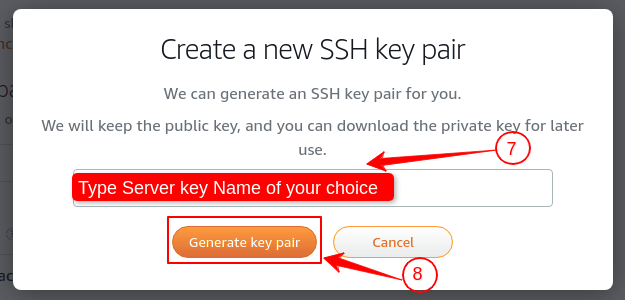
After clicking on the Create button, you have to provide the SSH Key Pair name and click on generate key pair.
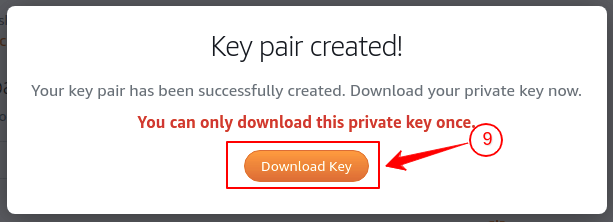
Your Lightsail instance SSH key pair is generated. Now click on the Download key to save the SSH key pair on your computer.
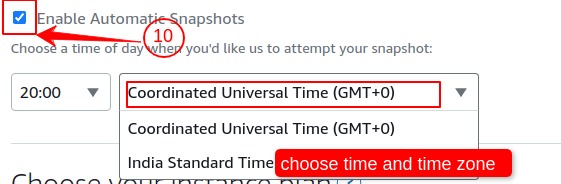
Below the SSH key pair field, you will find an option to enable automatic snapshot. You may select this option or ignore it. Again, it is recommended to select an automatic snapshot for a rainy day.
Enable automatic Snapshot for Backup
If you enable automatic snapshot, you will be billed separately for the snapshot service. Normally Lightsail snapshots cost $0.05 USD/GB-month for both instance snapshots and for disk snapshots.
To enable automatic snapshot, you need to fix the time to trigger automatic snapshot. Choose your time accordingly.
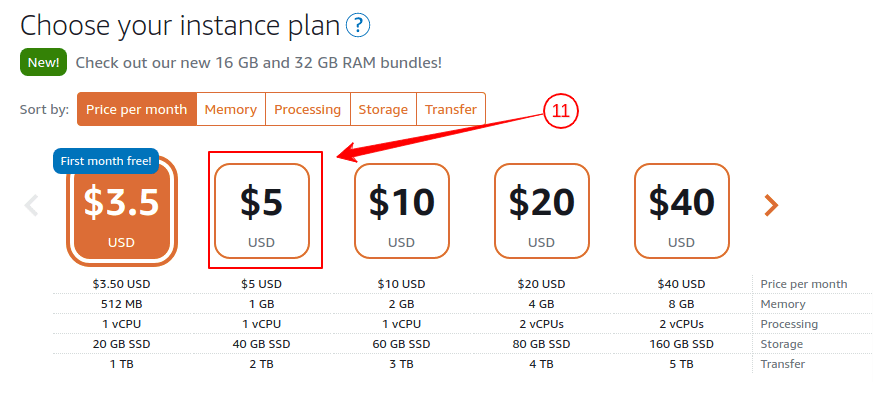
Choose AWS Lightsail Instance Plan
When you move to new server, assuming you are moving wordpress to AWS Lightsail. Always, think about your server usages per month. Based on that choose the plane.
Now, it’s time to choose an AWS Lightsail instance plan. Depending upon your website estimated traffic and functionality of the website, choose an instance plan wisely. There are different types of instance in terms of price, memory, processor, storage, etc.
In my case, I am selecting a $5 instance.
After selecting the instance plan, now add instance name, add key only tags and add key only value tags. You can leave this part also, it’s completely optional. Now, click on Create instance.
Hurray, your Lightsail instance is launched.
Step 2: Instance Connect via SSH access
Connect your instance using SSH. You can connect to your Lightsail instance using two ways.
- SSH using ssh client.
- Connect using a browser-based SSH client
Connect using SSH client
If you are connecting from Ubuntu or Mac, you can connect using the terminal. When you try to SSH using a server key, you may get a server key bad permissions error. So, before connecting to the server, change the server key file permission.
To change the permission, use the following command.
$ sudo chmod 400 server_key.pemNow, run the following command to connect the instance from the terminal.
$ ssh -i “Server_key_file_with_path” "user"@"Server_IP"Server_key_file_with_path: Your server key location
User: User of the server.
(In my case, user is bitnami)
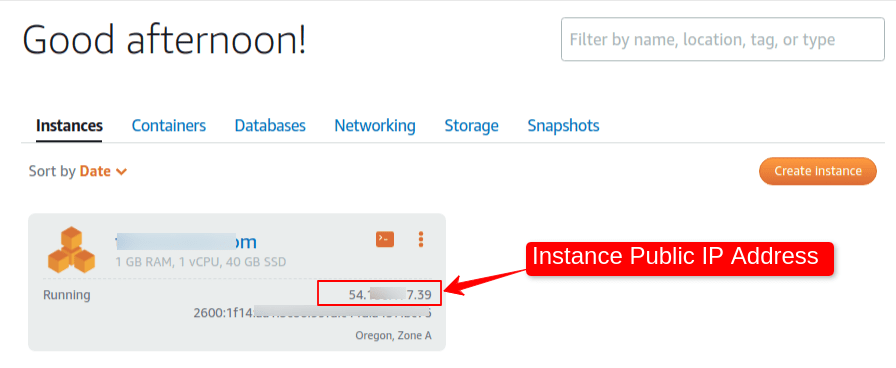
Server_IP: Your instance Public IP Address.
If you are connecting from windows, you have to convert the server key file from pem to ppk. After converting the server key file, you can connect via the PuTTY ssh client to the instance.
Connect using browser-based SSH client
You can connect using browser-based SSH client.
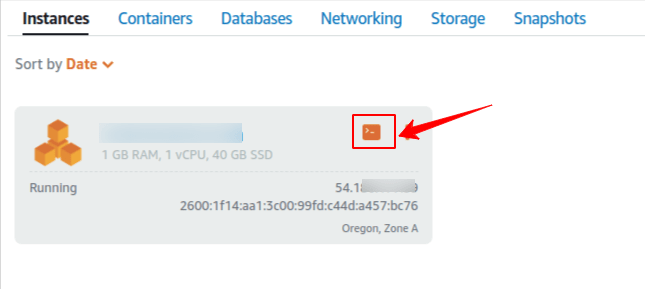
or click on the instance, find out more connecting options.
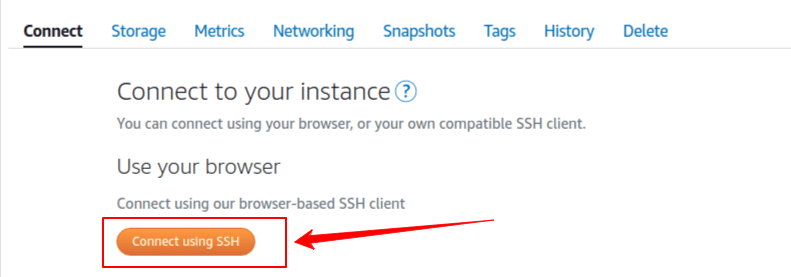
I am assuming you are successfully connected to the Lightsail instance.
Step 3: Upload WordPress Files and Database Dump
Till now, I explained instance creation and ssh access. Now I will show you how to upload files via SCP. Run the following command to upload your wordpress files and database dump.
$ scp -i [login key file path] [Source Files] [username]@[Server IP]:[Destination]After uploading the wordpress files, again SSH to the instance.
Step 4: Setup WordPress Files and Database
On the server console, check your uploaded files and move them to the temp directory. In the temp directory, extract the wordpress backup zip file by following command.
$ cd /tmp
$ sudo unzip wordpress_backup.zip
After unzipping the backup, move the files to the htdocs directory on bitnami home.
$ sudo cp -a wordpress_backup/. /home/bitnami/htdocsYour wordpress backup files are now on the document root of the server.
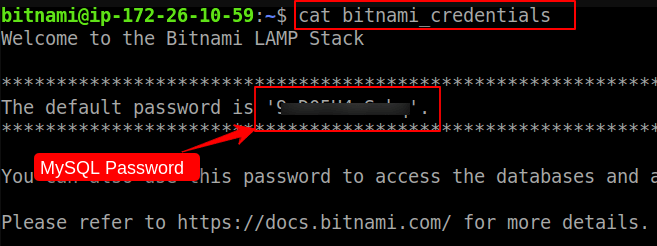
Find MySQL password in the bitnami instance
To find the MySQL password in the Bitnami instance, check the home directory after login to the server. You should find a file named bitnami_credentials.
[Important Point: As you choose a pre-configured bitnami instance, you might wonder about MySQL password. But, bitnami provided a credential file, where you can find MySQL password.]
Open the file using cat command on the console.
$ cat bitnami_credentialsOutput should be something like this
Create a Blank Database
Now create a blank database to import the database dump. Let’s create a database first by following commands.
Login to MySQL using following command.
$ mysql -u root -pInsert the MySQL password to login.
On successful login to the MySQL dashboard,run the following command to create a blank database.
mysql> CREATE DATABASE wordpress;
mysql> exit;
MySQL Database dump Import
To import the database dump we already uploaded, run the following command on home directory.
$ mysql -u root -p wordpress < database_dump.sqlAgain you need to type MySQL password to perform the operation. On successful import, you should check the database by login to MySQL dashboard.
mysql> SHOW DATABASES;
mysql> USE wordpress;
mysql> SELECT * FROM users;
It will show you the wordpress database user table. Your database is successfully imported.
Step 5: Configure wp-config file
Now, you have to change the database password on the wp-config file to connect the website to the imported database.
To modify the wp-config file, go to document root.
$ cd
$ cd htdocs
$ sudo vi wp-config.php
Change the database name and password and save the file.
Step 6: Change WordPress Files Permission and Ownership
To change the permission and ownership of the bitnami wordpress directory run following command.
$ sudo chown -R bitnami:daemon /opt/bitnami/apache2/htdocs
$ sudo find /opt/bitnami/apache2/htdocs -type d -exec chmod 775 {} \;
$ sudo find /opt/bitnami/apache2/htdocs -type f -exec chmod 664 {} \;
$ sudo chmod 640 /opt/bitnami/apache2/htdocs/wp-config.php
Step 7: Check the Site Migration by Local DNS change
Before changing the DNS setting on Domain registrar, check the website by changing local DNS settings.
To modify it in the ubuntu machine, open a new terminal window. Run the following command.
$ sudo vi /etc/hostsNow add the IP with domain name as shown below.
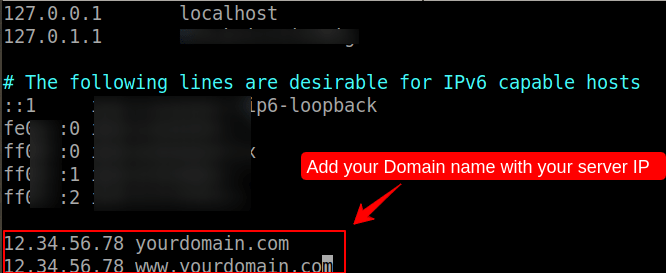
After adding the domain name and IP, you can check the website on your computer browser. If everything works perfectly, you can change the DNS on your Domain registrar. If you are using route53 as DNS, click here to know more about route53 configuration.
Step 8: SSL installation(Let’s Encrypt)
Now, your website is running on AWS Lightsail Instance, Now you need to reconfigure your SSL certificate. In bitnami you can easily reinstall your Let’s Encrypt certificate.
Run following command to install Let’s Encrypt SSL certificate on AWS Lightsail instance.
$ sudo /opt/bitnami/bncert-toolFollow the instructions to complete the SSL installation. You can check how to install Let’s Encrypt SSL certificate.
Conclusion
In this tutorial, you have learned to Migrate WordPress to AWS Lightsail Instance. Follow this article thoroughly to install quickly. If you have any doubts feel free to contact me, I will definitely try to help you. Also, you can join our elite Facebook group to get direct help from me. If you like this tutorial, please share this article on your social media handle.


")